Tuesday, June 30, 2015

Indian style Salmon Fish Fry | Salmon Fish Fry | Easy Fish Fry Recipes | Sunday special recipes


salmon fish fry

Indian style salmon fish fry is yet another easy n tasty recipe. I never tried salmon in India. After coming to Singapore, I tasted the salmon fish with brown sauce sauce for dinner at a restaurant. It was so delicious and I loved the taste.
So I wanted to prepare my own Indian style Salmon fish. This is very easy to prepare and tastes great. Let's see how to make it.

You can check the other fish recipes below

Indian Style Salmon Fish Fry

Preparation time: 5min + 1 hr soaking time | Cook Time: 15 min | Serves: 4
Recipe Category: Side dish | Recipe Cuisine: Indian

Ingredients 
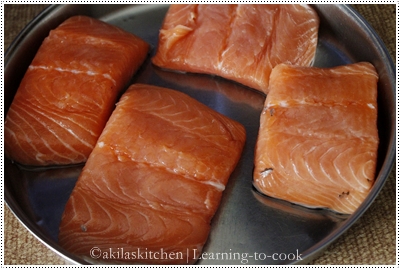
Salmon fish - 4 pieces
Chilli powder - 1 tbsp
Coriander powder - 1 tsp
Cumin powder - 1 tsp
Turmeric - 1/5 tsp
Pepper - 1/2 tsp
Ginger garlic paste - 1 tsp
Lemon juice - 1 tbsp
Salt - as per taste
Olive oil for frying

Method 

1. Wash the salmon and pat dry.

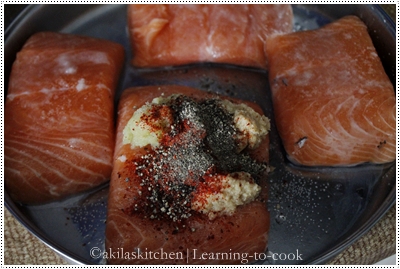
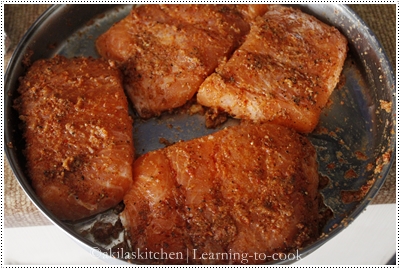
2. Marinate the fish with chilli powder, cumin powder, turmeric powder, coriander powder, salt, pepper and lemon juice and ginger garlic paste. 

3. Let it rest for 1 hr to 2 hr. 

4. Now add oil in a pan and fry the fish on both sides until they turn light Brown on both the sides. 
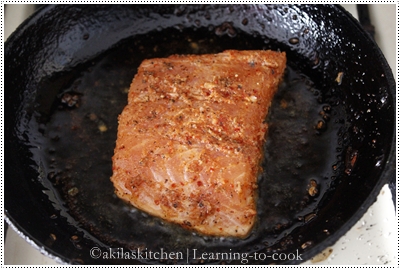
5. Remove from the pan, when ready. 

Yummy Indian style Salmon Fish Fry is ready

Indian Style Salmon Fish Fry

Yummy Salmon Fish fry in Indian Style is ready to be served...

Notes:
1. Frying in Olive oil, gives richer taste. You can also fry in cooking oil.
2. The mentioned spices can be adjusted according to your spice level.
3. Squeeze little lemon juice before serving, gives a nice tangy taste. But it is purely optional.


Thursday, June 25, 2015

Drumstick Rasam | Murungai Rasam | Murungaikai Rasam | Easy Rasam Recipe

drumstick rasam

This Drumstick Rasam or Murungai Rasam was staying in my draft when I wanted to clear and check my recipes. So posting it now. I had one drumstick leftover after preparing this mangai murungai kathiri sambar. So I decided to give a try with drumstick Rasam whose recipe I got from here. Rasam came out good and I loved the taste. This is slightly different from the ordinary rasam preparation. Do give a try and let me know hiw it came for you. 

If you want you can try different rasam recipes below
Mango rasam - my favorite


Murungai Kai rasam

Drumstick Rasam / Murungai Rasam

Preparation time: 15 min | Cook Time: 15 min | Serves: 4
Recipe Category: Main | Recipe Cuisine: South Indian


Ingredients
Drumsticks – 1 no (long)
Tamarind Pulp – 1 tbsp
Red Gram (Thuvaram Parippu, Toor Dal) – 3 tbsp
Turmeric Powder (Manjal Podi, Haldi Powder) – 1/4 tsp
Peppercorns  – 5 to 7 nos
Coriander Seeds  – 1 tsp
Split Bengal Gram  – 1 tsp
Garlic – 3 to 4 cloves
Tomatoes – 1 no (chopped into small pieces)
Salt as per taste
Asafoetida – A pinch
Curry Leaves  – 1 stalk
Mustard Seeds  – 1/4 tsp
Dry Red Chillies - 5 to 6 nos
Cumin Seeds – 1 tsp
Oil or Ghee – 2 tsp
Coriander Leaves chopped – 1 tbsp


Method
1. Pressure Cook Red Grams in water for 2 to 3 whistles with a pinch of turmeric powder. Keep it aside.
2. Soak tamarind in water for 10 to 15min. 

3. Heat Oil or Ghee in a pan and fry Peppercorns, Coriander Seeds, Bengal Gram, crushed Garlic and half of the dry Red Chillies

4. Fry till they become slight brown colour.
5. Transfer the content to the food processor.
6. Grind into a paste adding little water. Keep it aside.
7. Take the Drumstsicks and cut them into 3 inch pieces. In a vessel add the cut drumsticks and add just enough water till the drumsticks are covered. Add a pinch of turmeric powder.

 8. Cover and cook till done.
9. Meanwhile, extract the tamarind juice, and add the tomato, salt, asafoetida and keep ready. Also extract the red gram water and keep it ready.

10. Check whther the drumstick are cooked fully.
11. To this, add the tamarind water, and allow to boil. Add the ground paste (step 4). 
12. When it starts boiling, add the red gram water 
13. Heat Oil or Ghee in a pan and pop the Mustard Seeds and Cumin Seeds. Now add the remaining broken Dry Red Chillies and Curry Leaves. Saute it.
14. Add the tempering to the rasam.

15. Garnish with coriander leaves.


16. Yummy Drumstick Rasam / Murungai Rasam is now ready to serve with rice.


Monday, June 22, 2015

Eggless Tutti Fruitti Cake | How to make Tutti Fruitti Cake | Eggless Cake Recipe

Fruit Cake

Eggless Tutti Fruitti Cake is one of my favorite cake in my childhood days. I love to eat tutti Fruitti from them. I adopted the cake from here and it came out awesome. I could not wait for the cake to cool down as my children were after me and I was in a hurry to click the pictures. If the clicks were not good this the reason 😜😜. 

You can also check the below recipes if you like some eggless bakes.


tutti fruitti cake

Eggless Tutti Fruitti Cake

Preparation time: 10 min | Cook Time: 40 min | Serves: 4
Recipe Category: Baking | Recipe Cuisine: Indian/International

Ingredients 
All purpose flour - 1.5 cups
Curd - 1 cup, beaten to buttermilk consistency
Sugar - 3/4 cup (or powdered sugar)
Tutti fruitti - 1/2 cup
Oil - 1/2 cup
Baking powder - 1 1/4 tsp
Baking soda - 1/2 tsp
Salt - a pinch
Vanilla Essence - 1 tsp
Milk - 1 to 2 tsp for brushing
Flour - 2 tsp to coat the tutti fruitti


Method 
1. Preheat oven for 180 C. Sift the all purpose flour, baking powder and baking soda to get proper mixing. 

2. Add the beaten curd.

3. Add the sugar.

4. Beat them to mix nicely. (But do not over beat it)

5. Add the oil.

6. Add the vanilla essence.
7. Slightly mix them. Do not beat well.

8. Add the flour and beat in low speed without any lumps.

9. Add the tutti fruitti now.

10. Mix gently with a spoon.

11. Take the pan. Either dust the pan with flour or use butter paper.

12. Add the cake mixture now.

13. Bake it for 35 to 40 min.

14. When the time reaches, insert the tooth stick and check whether it comes out clean.

15. Cool the cake on the rack.

16. Cut them into slices and serve.


Yummy Eggless Tutti Fruitti Cake is ready.

Notes:
1. You can mix the tutti fruitti with the flour, so that, while getting baked, they wont settle down at the bottom.
2. I followed blindly followed the recipe and came nicely. But as per the original recipe, the sugar quantity is 1 cup instead of 3/4th cup.


Tags: , , , , ,

Thursday, June 18, 2015

Channa Pulao | How to make Channa Pulao step by step | Pulao Recipes


how to make channa pulao


This Channa Pulao, I have never tried before and this is the first time I tried and it was a immediate hit with my family members. Normally, I make channa masala using the channa, since i do not know much recipes with this. But when tried this pulao, it really tasted yummy even with simple onion tomato raita. You can check the list of pulao recipes here. 

How to make Channa Pulao

Preparation time: 35 min + Soaking time of rice and Channa | Cook Time: 20 min | Serves: 4
Recipe Category: Main | Recipe Cuisine: North Indian

Ingredients 

Spices To Temper
Fennel Seeds - 1/2 tsp
Cloves - 4
Cinnamon stick - 1
Cardomom - 1
Bayleaf - 1
Star Anise - 2

For Pulao
Basmathi rice - 3 cups
Channa / Chick peas - 1 cup
Onion - 2 (chopped lengthwise)
Ginger Garlic Paste - 1 tbspGreen Chillies - 2 (slit into half - lengthwise)
Channa powder - 1.5 tsp
Mint leaves - 1 tbsp (optional - chopped nicely)
Coriander leaves - 2 tbsp (chopped nicely)
Water - 4.5 cups
Oil - 2 tbsp
Ghee - 2 tbsp
Cashews - few (optional)
Coriander leaves for garnishing
Salt - as per taste

Method 
1. Soak the rice for 20min atleast.


2. Soak channa for 4 hrs and pressure cook for 3 whistles. (* See notes)

3. In a pressure cooker, add oil and add the spices one by one and fry for a min.
4. Add the onion, green chillies and the ginger garlic paste and saute till the onion becomes translucent.
5. Add the coriander leaves and salt.

6. Saute them.

7. Add the channa masala powder.

8. Add the channa.

9. Add the water and when boiling, add the soaked rice.

10. Cover and cook under low flame for exactly 10 min. When the pressure goes down, remove the lid.

11. Add the ghee and mix well, without breaking the rice.

12. Serve hot with raita.


channa pulao

Yummy and delicious Channa Pulao is ready.

Check the video here


Notes:
1. If channa is soaked overnight, no need to pressure cook it separately. It will become very mushy, as we cook it along with rice. If soaked for 4 hours, pressure cook first and then again cook with rice.
2. Adding the channa masala is enough, as it gives unique flavor. If you want, you can add garam masala also. But keep in mind to check for the spiciness.


Tags: , , , , , , ,

Related Posts with Thumbnails

My Wonderful Followers

Ads

Add to the circles

Learning-to-cook   © 2008-2015. Template Recipes by Emporium Digital

TOP  

//