Thursday, October 29, 2015

How to remove poultry smell from chicken


How to remove smell from chicken: We always face the trouble of getting rid of poultry smell or the raw chicken smell coming from the chicken. Though most people like cooked chicken, the poultry smell is disliked by most of the people. Here I give some easy tips to get rid of the smell from raw chicken. 


Remove poultry smell from chicken


Tip1: To remove poultry smell from chicken, rub chicken with turmeric powder and then wash off.

Tip 2: Pour 1/2 a cup of white vinegar over the chicken and mix well to coat all the chicken. Leave aside for 4-5 minutes. Now wash the chicken thoroughly under running water.

Tip 3: Rub the chicken with salt. Leave it aside for 5 min. Then wash off with running water

Try these tips and let me know how it worked for you... 

Also if you follow other tips instead.. Share it here...

Chicken Image: freeimages


Tuesday, October 13, 2015

Bitter gourd Pulao | Pavakkai Pulao | Easy Pulao Recipes


Bitter gourd Biryani or Bitter gourd Pulao what ever you may say, is the one which I planned to try long before, but due to my doubt how the taste would be, I kept postponing the recipe from trying out. But after seeing the recipe here, I got guts to try my version and finally I tried it and came out good. It was not that much bitter as I expected, but still has light bitter taste, and I loved it. 

You can check the other biryani/pulao recipes here.


Bitter gourd pulao

Preparation time: 35 min | Cook Time: 20 min | Serves: 4
Recipe Category: Main | Recipe Cuisine: South Indian


Ingredients I - To soak for 30 min (To remove the bitterness)
Bitter gourd - 1
Sour curd - 3 tbsp
Tamarind - 1 amla size
Salt - 1/4 tsp
Water - 1 cup

Ingredients II
Biryani Rice - 1.5 cup
Water - 2 cups
Coconut milk / milk - 1 cup
Cloves - few
Cinnamon - 1 inch
Bay leaf - 1 crushed
Fennel seeds - 1/2 tsp
Annasi poo - 1
Big onion - 1 cut length wise
Biryani masala - 1 tsp
Green chilli - 1 (cut lengthwise)
Mint and coriander leaves - a handful
Ginger garlic paste - 1 tbsp
Ghee - 2 tbsp
Oil - 2 tbsp
Curd - 1 tbsp

Method 
1. Soak the rice for 20 min.

2. Cut the bitter gourd into medium sized. Not too thick or too thin. 

3. Add the sour curd, tamarind, salt and water and mix it.

4. Add the bitter gourd pieces and soak for 30 min.

5. After 30 min, remove them and wash nicely.

6. Squeeze out the water completely and keep it aside to dry and start preparing the biryani.

7. Add the oil and when hot add the spices one by one and fry for a min.

8. Add the onions. Sauté it. Add the ginger garlic paste. Sauté till raw smell goes off.

9. Add the chopped mint leaves and coriander leaves and green chilli.

10. Add the biryani masala.

11. Add the bitter gourd pieces. 

12. Add little curd/yogurt.

13. Sauté the bitter gourds.

14. Add the water and milk or coconut milk. Allow to boil. 

15. Add the soaked rice.

16. When booking close the cooler lid.

17. Cool in low to medium flame for 10 min. 

18. Open the lid, when the pressure reduces and add the ghee.

19. Mix well without breaking the rice.

20. Serve the Bitter Gourd Biryani.


Yummy Bitter Gourd Pulao is ready.

Notes:
1. Instead of biryani masala, you can add the garam masala also.
2. You can even add the chilli powder, turmeric powder and tomato to make it as pure Biryani.
3. The bitter gourds will have slight bitterness.
4. You can skip the milk/coconut milk and add only the water.
5. You can even add half tbsp of lemon juice while sauting the bitter gourds, which is again done to reduce the bitterness. But i did not do that.

Tags: , , , , , , ,

Friday, October 9, 2015

How to store lentils without bugs or insects


How to store lentils without the insects for a longer time: Saving lentils like toor dal, Chana dal etc would be a great headache for the ladies that too who stay outside India. Because our mother and inlaws give the lentils in a large quantity and saving them from the black small bugs or insects is a problem. Finally we need to throw the whole packets out. 

No need to worry now. Just follow the simple tips here and try to store the lentils for a longer time. 

How to store toor dal without insects


Tip 1: Add little castor oil to the lentils like toor dal and mix well. It helps to keep away the insects like small black ones. 

Tip 2: Add few neem leaves or dry red chillies along with the lentils and save in a air tight container. 

Tip 3: Transfer the lentils to a freezer safe containers and you can keep it in the freezer. Whenever you want you can take small amount. 

Tip 4: Add little turmeric powder and mix with the lentils. 

Tip 5: If buying in very large quantity, mix the lentils with boric powder. But take care to wash them very nicely before using it. 

Note:
1. Always try to buy the fresh or recently packed lentils. If the lentil packet has little powder like stuff, discard it. 
2. Always use a clean and dry spoon. Any moisture content may bring in the insects. 

So do you follow any other tips in storing the lentils away from bugs??? Share with me. 


Tuesday, October 6, 2015

Cooking tips: How to clean Oily Vessels

Tips to clean oily vessels: Cleaning oily vessels is always a tough job for the ladies. It's not like other vessels as the oil will stick and does not go easily.  I have some tips to make your job easy and you can clean the oily vessels with an ease and no need to fight with it.

Image credit: freeimages


Tip 1: Using Tamarind

This is age old method which is used in many Indian households to clean oily brass lamps and to make it shiny. Take a small piece of tamarind and clean your vessels first with tamarind or tamarind pulp and then with your soap as usual. 

Tip 2: Lemon

Wash the oily vessels with plain water and then apply the leftover lemon on all the parts. Leave it for sometime and wash with dish washing liquid.

Tip 3: Baking Soda

Wash the vessel with baking soda first and wash it with dish washing liquid normally. 

Tip 4: Vinegar

Like lemon vinegar is also used to clean the oily vessels. Soak the vessels in warm water mixed with vinegar for few minutes. Then wash it off.


Tip 5: Kitchen tissue or paper towel

Before washing the vessels, wipe the oil using the tissue or the paper tower. The paper towel absorbs the oil completely. Now wash as usual. 

Tip 6: Use Hot water

Soak the vessels with hot water for a while before washing. It eases your job.

Tip 7: Concentrated soap

Use the concentrated soap or liquid directly on the oily vessels. Soak for a while and then wash it off. 

Tip 8: Flour (APF or Wheat flour)

Rub the oily vessels with the flour. It makes your job easy by absorbing the oil. Then you can wipe it with a cloth or paper. Then you can wash the vessels. 

So which method are you following to clean the oily vessels??? Share your tip in the comments. 


Wednesday, September 30, 2015

Cooking Tips: How to remove fish smell from hands

How to remove fish smell from your hands - yes...  this would be the first question which comes to our mind when we need to clean the fish. Though we can cut and clean the fish, it would be disgusting when our hands smells like fish and we need to get rid off that fish smell.

Don't worry, here I give some tips to remove the fish smell from your hands. 

Tip 1: Wash your hands with salt. Yes take 1 tsp salt and rub on your hands. Wash it off. 

Tip 2: Take 1tbsp of Apple Vinegar or Lemon juice and apply on your hands. Then wash it off. Fish smell goes off. 

(Some times I combine both the above tips)


Tip 3: Take little amount of baking soda and water. Make a paste and apply on your hands and rinse off. 

Tip 4: Take a small amount of tooth paste and rub and wash your hands using it. (Got from internet)

Tip 5: Rub your hands in a stainless steel vessel. (Does it work really??? I have not tried it. Source here)

Tip 6: Wash your hands with normal soap adding tbsp of sugar. Rub your hands until the sugar dissolves. Check, now your fish smell is also gone. (Source here)

So do you have any other better tips to remove the Fish odor from hands??? Then plz share here.... 😊😊

Monday, September 28, 2015

Cooking Tips: How to peel garlic skin easily

How to peel skin of garlic cloves easily: We always have difficulty in peeling the skin of garlic cloves.. That too when we need to prepare the ginger garlic paste, where we do in bulk quantity, we always have this trouble and it is a time consuming task.

So here I give some tips to remove the skin easily. 

Tip 1: If you have microwave oven,  just microwave the garlic for 15 sec. Now try to remove it. It comes out easily. 

Tip 2: If you do not have microwave, then in a vessel, add the garlic and heat it up and peel the skin. 


Tip 3: check this link, where they mention how to peel garlic in less than 10 seconds 

Or do you follow any other method to remove the skin from garlic. Share with me. 

Thursday, September 24, 2015

Masala Bread Upma | How to make Masala Bread | Bread Recipes


Bread Masala

Masala Bread or Masala Bread Upma what ever you may call it, is a wonderful quick dish which can be made in a jiffy on a lazy day. Sometimes, when there is leftover bread or you got bored of eating the same bread, then you can try this kind of different recipes using the bread. More bread recipes to come on this blog. Also I used the whole wheat bread to make it more healthy.

Some quick breakfast recipes for you...
Ragi semiya upma
Semiya upma
Idli Upma
Vegetable Rice Sevai Upma
Aval Upma
Simple Upma

Masala bread upma


Ingredients
1. Bread slices - 8
2. Onion - 1 big (cut lengthwise)
3. Tomato - 1 big
4. Green peas - 1/4 cup (optional)
5. Ginger garlic paste - 1 tsp
6. Tomato Sauce - 1 tbsp (optional)
7. Olive oil - 2tbsp
8. Mustard seeds - 1/5 tsp
9. Black gram - 1/4 tsp
10. Curry leaves - 1 spring
11. Coriander leaves for garnishing

Ingredients II
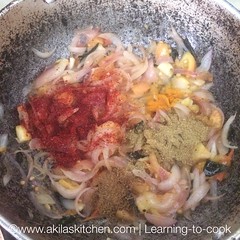
1. Turmeric powder - 1/5 tsp
2. Chilli powder - 1 tsp
3. Coriander powder - 3/4 tsp
4. Cumin powder - 1/4 tsp
5. Garam masala powder - 1/4 tsp
6. Salt as per taste


Method

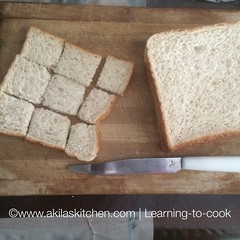
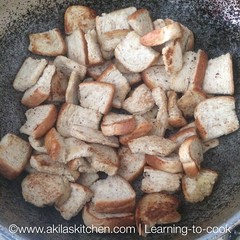
1. Try to cut the bread slices into the square shaped as shown below. But any shapes can do well.

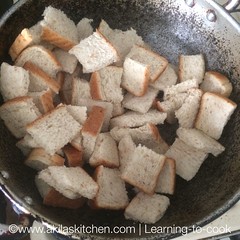
2. Add little oil in a tawa and fry the bread pieces.

3. Let it slightly turn in to brown colour. But do not over fry them. Remove and cool them.

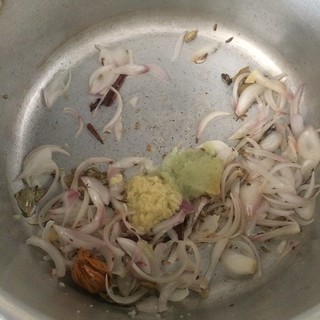
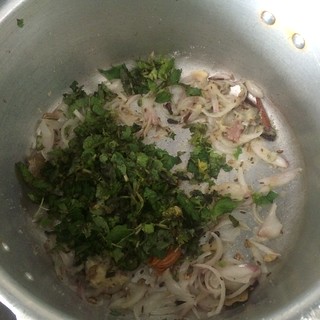
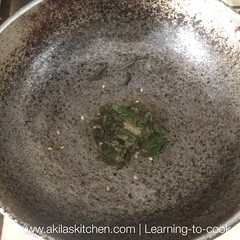
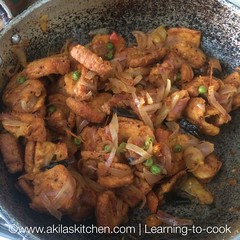
4. In same vessel, add oil and when hot, add the mustard seeds. When it splutters, add the urud dal(black gram) and add curry leaves.

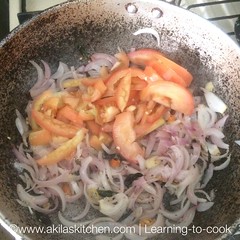
5. Add the onion, green chillies and the ginger garlic paste. Fry till, the ginger garlic smell goes off.

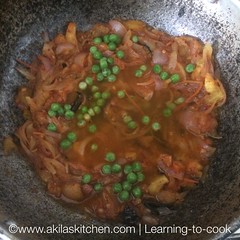
6. Add the tomato, when the onions have become translucent.

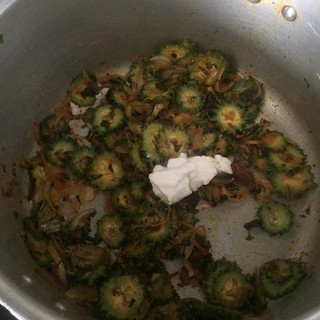
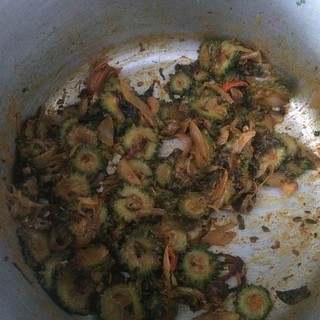
7. Add the ingredients in list II one by one.

8. Add the green peas and the water and cook for a while. (till green peas gets cooked).

10. Add the tomato sauce now.

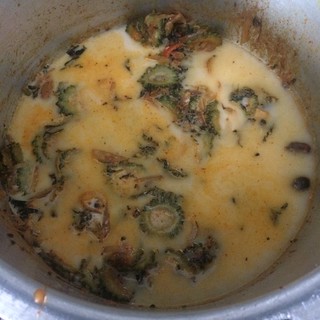
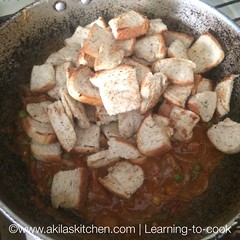
11. Add the bread pieces and mix them well, so that all the masala gets coated well.

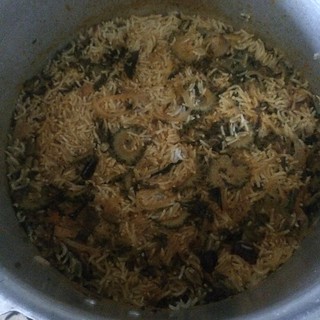
12. When the bread pieces, become soft and cooked, garnish with coriander leaves and switch off the stove.

13. Yummy Masala bread Upma is ready to be served.

Masala bread


Notes:
1. Frying the bread is done, in order to prevent the bread becoming soggy while adding to the masala / gravy which we prepared.
2. Instead of Olive oil, you can use normal cooking oil also.
3. Adding tomato sauce is purely optional. But it gives a nice tangy taste to the dish.
4. If you like you can add some vegetables and make it more healthier version.


Monday, September 21, 2015

Cooking Tips : how to store coriander leaves


I planned to share some cooking tips from this week onwards. Those who follow me on my FB page know that I post some easy cooking tips. For the benefits of others, I planned to share the same tips in my website also. But for the day to day updates, follow me on my FB page or Twitter or in Pinterest. 

Everybody, who start cooking for the first time, would have come across this situation. We buy fresh coriander leaves, but gets spoiled within 2 to 3 days. So here is a nice tip to save the leaves for a longer time. 

How to store the coriander leaves for a long time. 


Tuesday, September 15, 2015

Eggless Pista Cookies | Eggless Pistachio Cookies | Eggless Cookies Recipes


Eggless Pista Cookies

Eggless Pista Cookies are easy to make cookies yet so crispy, crunchy and yummy cookies. I prepared this small quantity only like 20 to 25 cookies and it got finished within 1 hr. If you want to try this and do more, then keep it in a air tight container.

Here are some the Eggless Cookies in this blog
Eggless Nutella Cookies
Eggless Butter Cookies
Eggless Peanut Butter Cookies
Eggless Oats choco chip cookies
Eggless Coconut Cookies
Eggless Dates Cookies

Pista Cookies

Eggless Pista Cookies

Preparation time: 6hrs including freeze time | Cook Time: 15 min | Serves: 20
Recipe Category: Snacks | Recipe Cuisine: International

Ingredients
All purpose flour - 1.25 cup
Butter - 100 gms (1/2 cup, room temperature)
Sugar - 1/2 cup (+ or -)
Milk - 2 tbsp
Vanilla essence - 1 tsp
Salt - a pinch
Pistachios - 1/2 cup

Method
1. Take Butter in a bowl. Beat it.

2. Add sugar.

3. Beat it nicely till it becomes creamy.

4. Add the vanilla essence and milk.

5. It should come to the consistency shown below. 

6. Now add the flour.

7. Mix and make a dough like consistency, without any lumps.

8. You can add the crushed pistachios. (I dry fried the pistachios)

9. Mix it evenly.

10. Now roll the dough in a butter sheet.

11. Cover the edges also as shown.

12. Freeze it for 4 to 5 hours. (Even you can freeze overnight).

13.Preheat the oven for 170 deg C. Cut into 1/2inch thickened circles.

14. Bake it for 15 to 28 min or till the edges becomes light brown colour. 

15. Yummy and tempting crunchy pistachio cookies are ready.

eggless pista cookies

Store the cookies in a airtight container. 

Notes:
1. The butter should always be in room temperature before you start beating it.
2. Instead of granule sugar, you can add the powdered sugar also. 
3. Adding some dried fruits like dried cranberry or raisins gives extra taste.
4. You can use wheat flour and make healthier version cookies.


Tags: , , , , , , ,

Related Posts with Thumbnails

My Wonderful Followers

Ads

Add to the circles

Learning-to-cook   © 2008-2015. Template Recipes by Emporium Digital

TOP  

//